Reno Casasola's 1940 Mercury


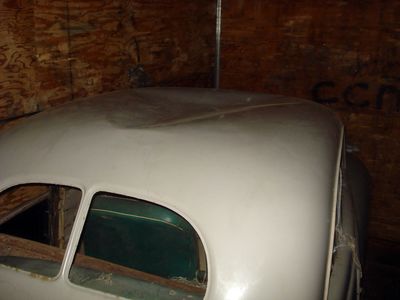


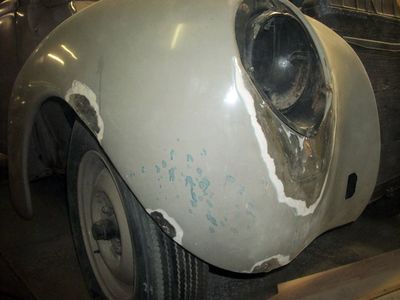






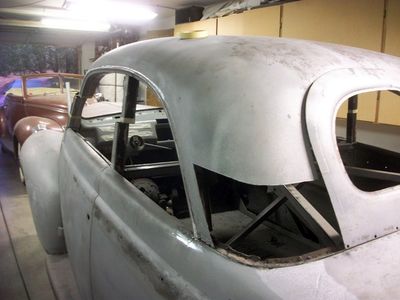






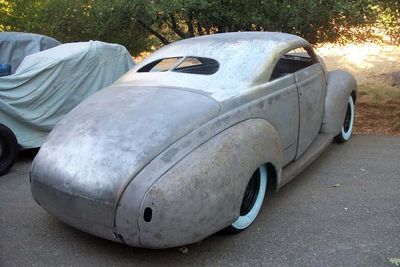


1940 Mercury Coupe restyled by Kevan Sledge of Colfax, California for Reno Casasola, of Guadalajara, Mexico. In early 2006 Reno went to a car show in a town called Cuernavaca. There he met a guy named Jaime Sordo. Jamie told he owned a 1940 Mercury coupe, that he had sitting around since the mid 1980s. Reno was immediately interested in the Merc, however it took about half a year to set up an apointment to see the car in person, and he did not even show at the appointment day. He went to a really bad neighborhood north of Mexico City. A worker of Jamie opened the garage and immediately when Reno saw the Merc he knew it was ment for him. The car was sitting there in a grey paint ,not finished but apparently very solid. A deal was made with Jaime, he simply told Reno: "Hey, I got this car since many years and i havent done much with it, i'm sure you can finish it the proper way. Give me 25.000 pesos (aprox 2.000 usd) and here are the papers, it's yours".
One evening in April 2012, Kevan spoke to Reno about that he considered getting back to doing Hot Rods and Customs for some part time work. Reno suggested he could customize his 1940 Mercury. This seemed like a good idea, and Kevan said yes. There was only one problem, Reno lives in Mexico, and the car was located deep down in the country near Guadalajara! First step was for Reno to dig it out of storage where it had been in hibernation for the last 7 years on his buddy's Ranch.
The Merc was then shipped from Guadalajara to Tijuana. During it's trip to Tijuana, a problem occurred, apparently the driver picked up an extra load along the way (or a few extra pesos and needed room, so he took the car off of the restraints and pushed it forward. then piled a bunch of items on top and on the side of it. And it looked like it was rolling around in the truck smashing into the front over and over. The reason the rear didn't get damaged is because there were wood boards screwed to the floor and the car would stop when it rolled back. Kevan finally made it back home the next night after a speeding ticket and two blow outs on the trailer, now the work could begin! The Merc was imported to Mexico in 1949, and now 67 years later, it was home in the US.
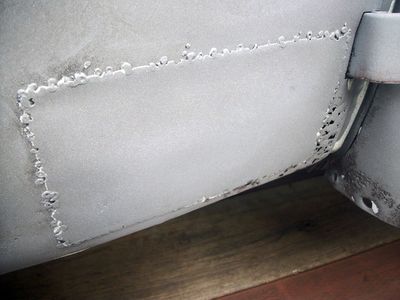
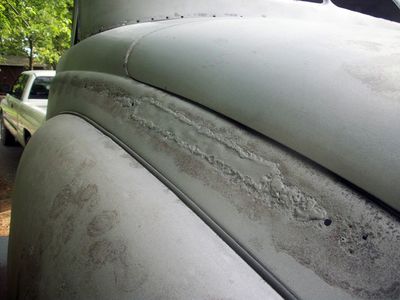
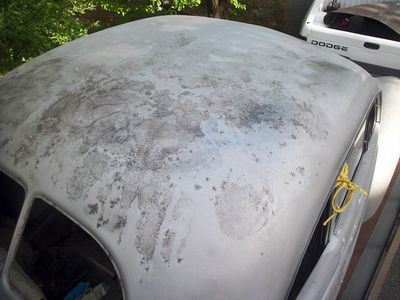
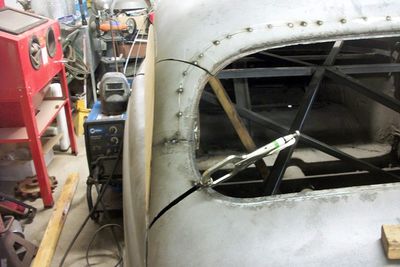
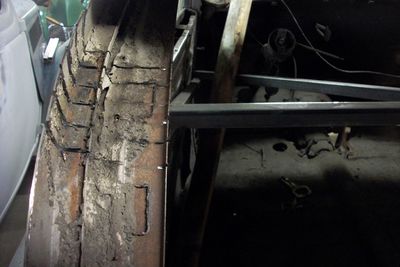
Kevan began with fixing the top, when stripping it, he found lots of hidden surface rust and bondo under the paint. Someone had partially restored it 10-15 years ago, and they apparently had done some bad work. The hood was totally wasted, and had to be replaced. A new one was purchased from Sacramento Kustoms. Over all, the hood was pretty strait, and it was off an old custom! The stainless holes had been filled with lead and the front had been peaked as well. Kevan kept digging around under the paint, and kept finding bad stuff, so they decided to send the car off to the sandblaster. Once the car was naked, lots of bad patch work appeared. But the overall body was actually pretty strait. It was a clever decision to strip it, because the whole car was covered in bondo and surface rust. All the bad areas were replaced and gas welded. The rear cross member was pie sliced and flatten out to lower the rear end. Reno wanted the car low, but not to low because of the bad roads in Mexico. They decided to lower it 8 inches. The factory spacer was removed, lowering it 2 1/4 inches, so now this crossmember had to be dropped 5 3/4 inches to meet their goal. There was only about 3 inches clearance between the frame and axle, so it had to be C-notched.
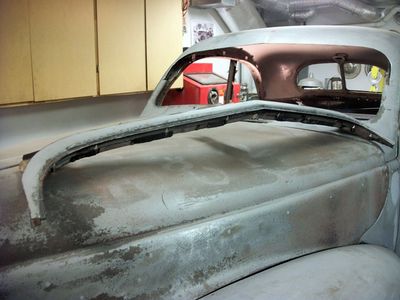
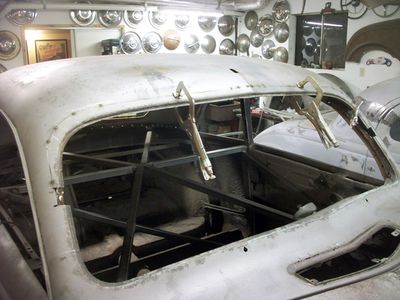
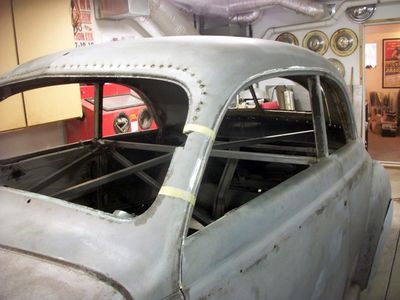
In July, 2012, the chopping process had begun. Kevan started the chop by raising the windshield up into the roof 1 5/8". It's easier to do this step first, that way you don't have to add a filler piece to the A pillar later. By raising the windshield, you remove the "forehead" above the windshield, making the front window even with the side windows. After the windshield was fully tacked in place, the drip rails were shaved. Then he cut out the back window. He left about 3" all the way around so there would be plenty of meat to work with. Then he cut 6" out of the A-Pillars, and 7" out of the back. Reno wanted the top to look almost like the one on Kevan Sledge's 1940 Mercury, therefore Kevan made some patterns off his Merc to get the same side window shape, so after he got the A-pillars set, he could begin reshaping the C-pillars to have the same flow. The A-pillars requires cuts top and bottom, and the bottom of the pillars needed to be slightly leaned back to line up. The flow of the C-pillar was rendered with cutting 6 slices right in the heavily curved area but soon Kevan realized it required 10 slices at 3/4" apart to get the same shape. After the C-Pillar and side windows had the right shape, Kevan moved onto the back window. Hee took 1 inch out of the back window and raised it up into the roof 1 inch. A subtle amount giving it the same height as the front windshield. Up next was the sail panels. He started by bending the basic shape around a welding bottle and tweaking it by hand, then he did some hammering on the outside edge. Next up was to do the transition panel of the roof into the trunk area. This piece is harder than it looks to make, and again Kevan turned to his welding bottle to curve the basic shape. This does not need a lot of curve, but it does have a peak in the middle, so that makes it a little difficult. He started by trying to make it in one piece but soon realized it had too much shape and would be easier to make it in 3 sections.
Plans were to keep all the stock running gear, but add some aluminum heads and a 2 deuce manifold to the engine.
Did you enjoy this article?
Kustomrama is an encyclopedia dedicated to preserve, share and protect traditional hot rod and custom car history from all over the world.
- Help us keep history alive. For as little as 2.99 USD a month you can become a monthly supporter. Click here to learn more.
- Subscribe to our free newsletter and receive regular updates and stories from Kustomrama.
- Do you know someone who would enjoy this article? Click here to forward it.
Can you help us make this article better?
Please get in touch with us at mail@kustomrama.com if you have additional information or photos to share about Reno Casasola's 1940 Mercury.
This article was made possible by:
SunTec Auto Glass - Auto Glass Services on Vintage and Classic Cars
Finding a replacement windshield, back or side glass can be a difficult task when restoring your vintage or custom classic car. It doesn't have to be though now with auto glass specialist companies like www.suntecautoglass.com. They can source OEM or OEM-equivalent glass for older makes/models; which will ensure a proper fit every time. Check them out for more details!
Do you want to see your company here? Click here for more info about how you can advertise your business on Kustomrama.


